
Media Hub
The Media Hub gathers the event’s photos, albums, face recognition and guest posts in one place. The detailed work happens on the Photos page, which has four tabs: All photos, Albums, Face recognition and Sharing with guests.
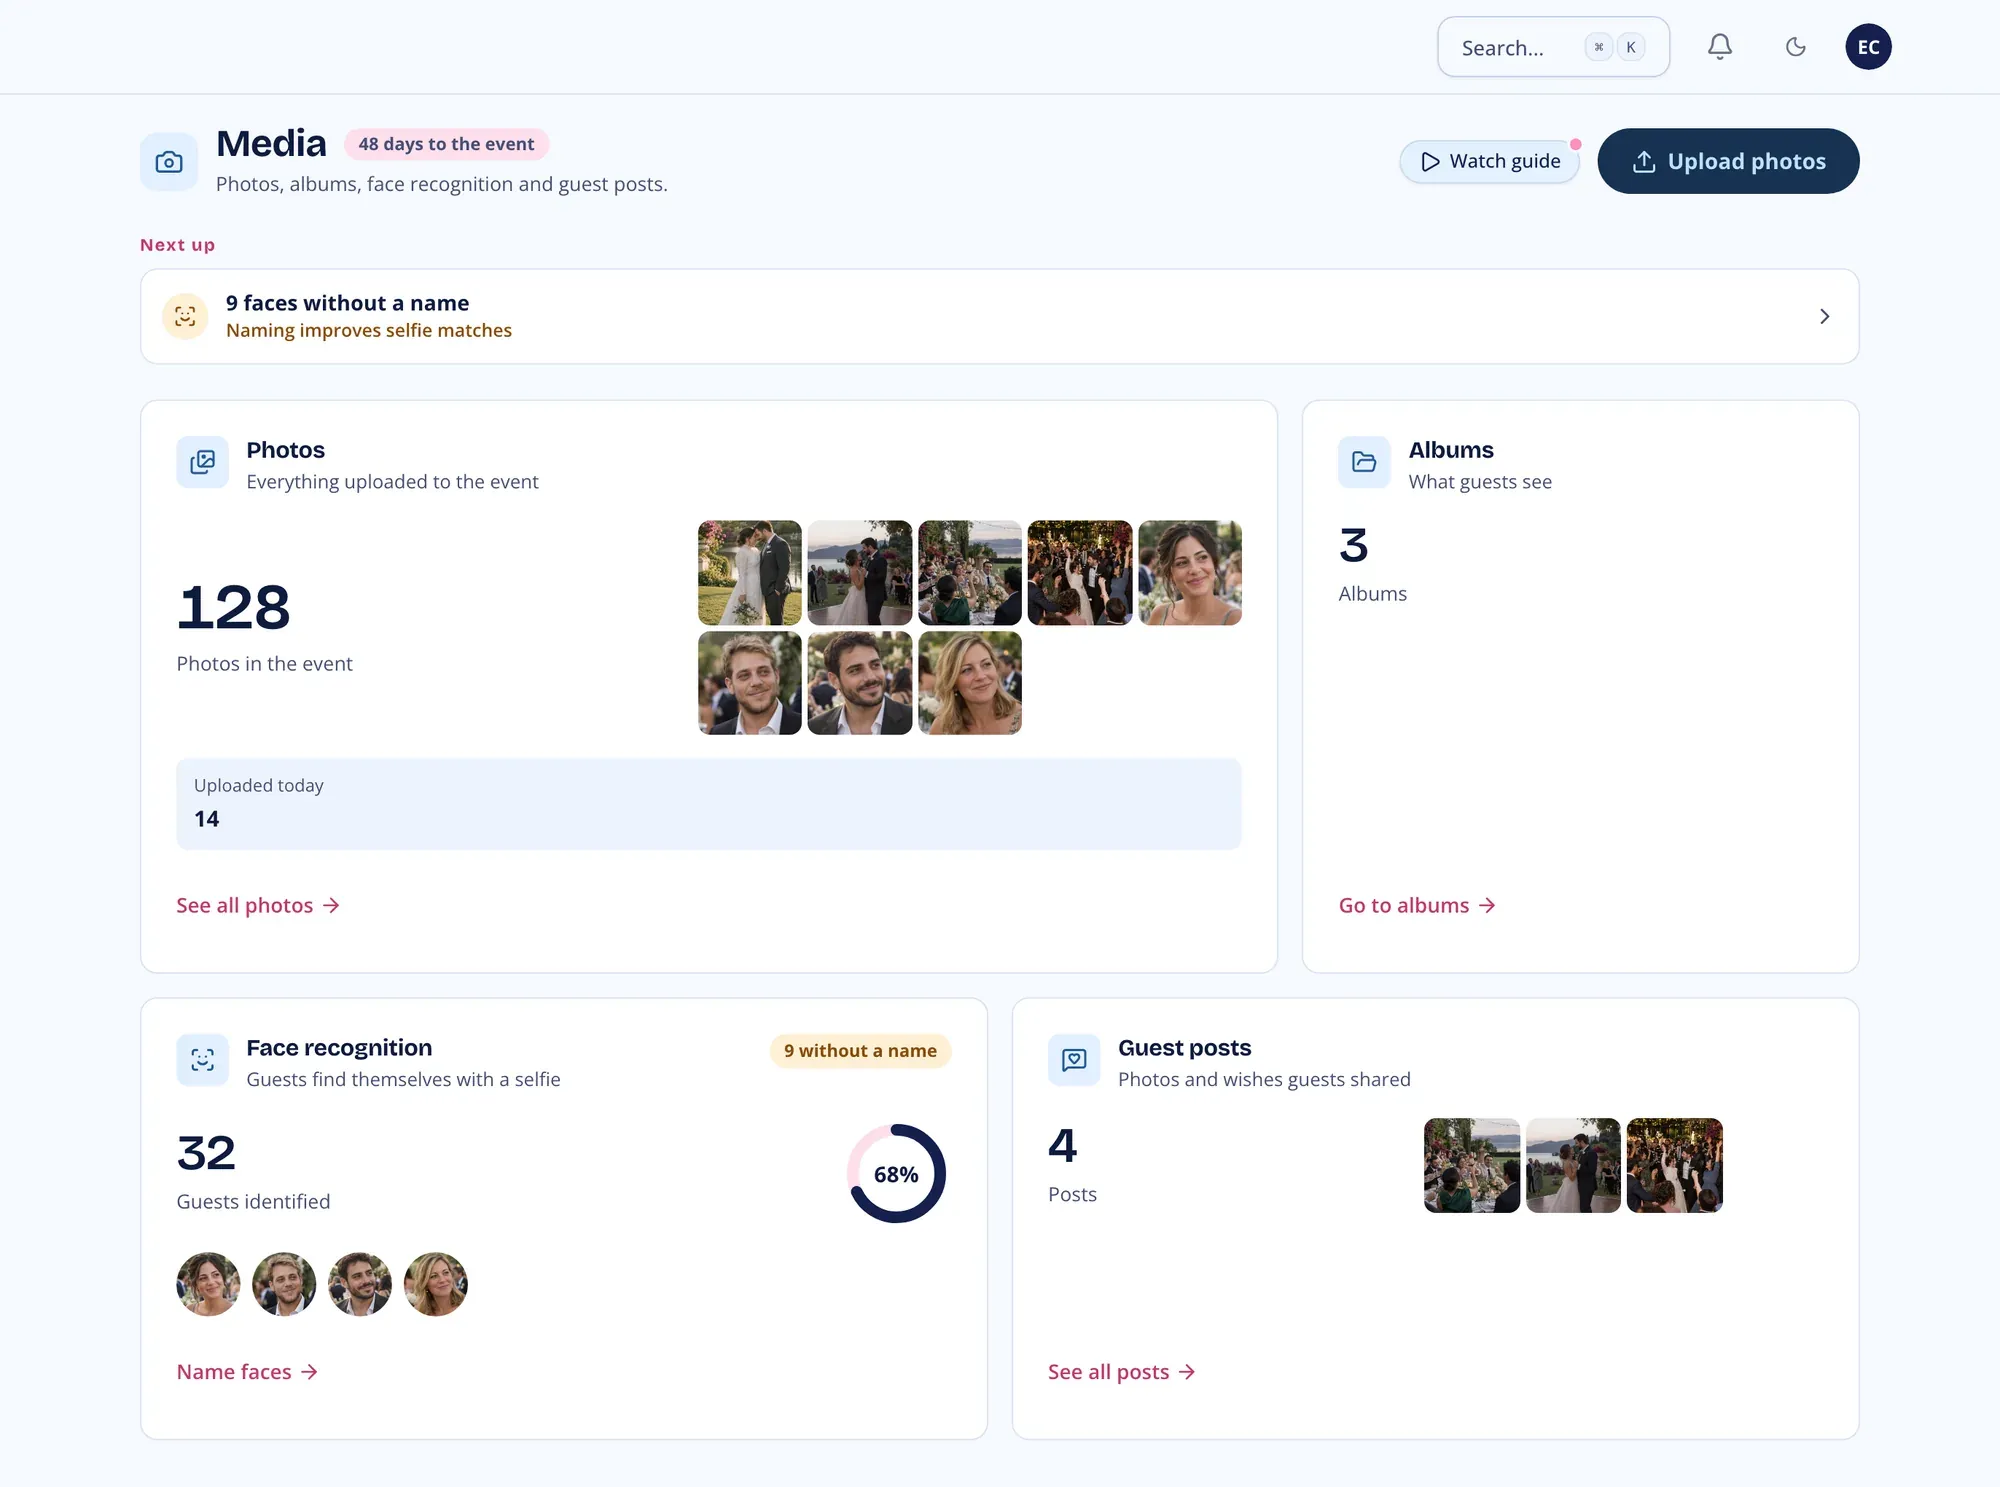
The Media Hub page
Section titled “The Media Hub page”Open Media > Media Hub in the sidebar. Photos, Albums and Face Recognition in the same menu open the Photos page on the matching tab. Guest Posts opens the guest posts page.
- Upload photos at the top opens the Photos page.
- Next up suggests what to do now: faces without a name, the Gallery QR code to print for the tables in the week before the event, and new posts from guests on the event day.
- Four cards show the numbers and link onward: Photos, Albums, Face recognition and Guest posts. On the event day, the guest posts card moves first.
Upload photos
Section titled “Upload photos”- Click Upload photos on the Photos page.
- Drag photos into the window, or use Choose files or Choose a folder.
- Close the window if you like. Photos upload in the background, three at a time.
A tray at the top of the page shows the progress, a rough time left and each file’s status, with Pause, Cancel and Retry for a file that failed. While you work on other pages, a small pill keeps counting the upload.
- JPG, PNG or WebP, up to 40MB each. iPhone HEIC photos are converted on upload when your browser can open them. If it can’t, the file is listed with the reason, so export it as JPG first.
- Files in another format or over the size limit are listed with the reason instead of being skipped quietly.
- Each person can upload up to 600 files an hour.
- Photos with a capture time are sorted into the event’s moments, taken from the Evening schedule in Settings.
All photos
Section titled “All photos”The tab opens with a summary: photos in the event, faces to name, people identified and guest uploads awaiting approval. Below it:
- Filter by Moments, Person, Album and Source (Official photos or Guest uploads). Guest photos carry a badge, and photos waiting for approval are marked Awaiting approval.
- Click a photo to open it full size, with the faces found in it and Delete.
- Click Select (or long-press on a phone) to pick photos. Shift-click picks a range on a computer.
- With photos selected, use Add to album or Delete. Download and Hide from guests are marked coming soon.
Albums
Section titled “Albums”Albums are what guests see on the event page.
- Open the Albums tab and click New album.
- Give it a name (suggestions come from the event’s moments) and pick the moments to include, or leave it empty and add photos later.
- Choose a cover and decide whether to Show the album to guests. Albums stay private unless this is on.
With no albums yet, one click creates an album for every moment that has photos. Each album’s menu can Open, Rename, Change cover, Show to guests or Make private, and Delete. Deleting an album keeps its photos in the library.
Face recognition
Section titled “Face recognition”Face recognition lets each guest find their photos with one selfie.
- Open the Face recognition tab and click Turn on face recognition. This asks for consent to biometric processing.
- Click Scan photos (or Scan faces with AI in the page menu) and scan every photo or only the selected ones. The scan’s progress shows in the tab.
- Name each face group on its card: search the event’s people or add a new name. When a named person looks similar, the card suggests them with a match percentage and Confirm.
The Identified and Waiting for a name sub-tabs sort the groups. Guests who found themselves with a selfie today are listed with Undo, and matches that weren’t approved automatically wait for Approve or Reject. A guest’s selfie is deleted after 90 days, and the names it put on faces stay.
Sharing with guests
Section titled “Sharing with guests”This tab controls the public gallery. A phone preview shows what guests will see while you change the settings.
- Publish the gallery to guests turns the gallery on, with Copy link and a QR code poster to print.
- Only photos in visible albums keeps every other photo private. When it’s off, every photo shows except hidden photos, photos awaiting approval and photos in private albums.
- Access level: Open (anyone with the link) is the only option today. Password and Personal link are coming soon.
- What guests can do: Find themselves with a selfie, Download full-quality photos and Add their own photos. With uploads on, Approve before publishing holds each guest photo until you approve it.
Click Save sharing settings when done, or Discard changes.